Easy 30 Minute Dinner Recipe: Mozzarella Stuffed Ground Turkey Meatballs, Wild rice, and Cucumber/Tomato Salad

Turkey,mozzdinner
This is very easy! But if you’ve never made meatballs before it could be intimidating…don’t fret. Just make sure that the ground turkey is well seasoned AND you don’t make the meatballs too big…you will be frying them and need them to cook through! Here’s what you’ll need:

1 pound of ground turkey
~5 Chunks of slices of mozzarella
1 cup of your favorite pasta sauce
1.5 cups of your favorite tomato soup
1 teaspoon of pepper
1 teaspoon of salt
1 teaspoon of garlic powder
½ cup of bread crumbs (use your favorite)
1 cup (2 cups cooked) of your favorite rice – I use wild rice!
½ cup of cut up cucumbers
½ cup of cut up tomatoes
3 tablespoons of balsamic
olive oil

Okay, ready to tackle this? Go.

First, take the ground turkey and mix it up with the salt, pepper, and garlic powder. I use my hands…you’ll have to use your hands to make the meatballs anyways. You can add parsley or whatever other seasoning you want too…it won’t hurt! So get ready to get dirty. Then cut up the mozzarella chunks so there is about 10, you can do more based on how many meatballs you want to make (aka pending on their size).

Now, use your hands to make small balls with the meat (it fits in my palm and I have tiny hands) take a small chunk of mozzarella and put it in the middle of the meatball. You shouldn’t see the cheese at all. Now, roll this around LIGHTLY in breadcrumbs. Set aside on a plate and make the rest of the meat like this. It’ll make between 10-13 meatballs.

Now, set the rice to cook.

In your largest skillet, put the olive oil so that it covers the skillet BUT NOT TOO MUCH. This is important. You want to put the skillet and oil on high until it heats up then reduce to medium. Place 3-5 meatballs in the skillet, do not over crowd it. While they are cooking…

In another large skillet, or just a pan if that’s all you have, add the tomato soup and pasta sauce and put on low.

Mix this every so often.

Roll the meatballs once or twice in the skillet. When they are a DARK brown on all sides, move to the red sauce combination and let them rest in there while on low. Keep doing this until all of the meatballs are done. When the LAST meatball is put into this mixture, turn it on medium-low and leave on for about 5 minutes. It’ll boil, that’s okay.

Combine the cucumbers, tomatoes, and balsamic; place this in a small salad bowl and set on table. The rice should be done by now, put your portion on plates.

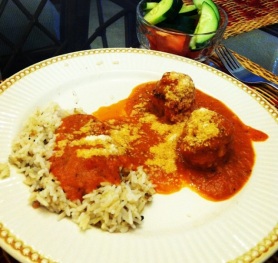
When the meatballs are done, place as many as you’d like on the plate and add a little bit more sauce on top. I topped it off with some parmesan cheese and inhaled it! It’s really scrumptious and, if well seasoned, it’s full of flavor. Have fun with this quick dinner!

Enjoy!

-Ena
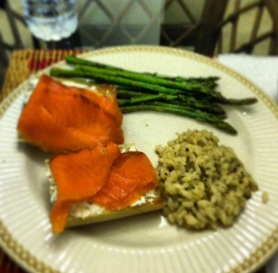
Easy 30 Minute Dinner Recipe: Smoked Salmon Sandwiches, Oven Roasted Asparagus, and Wild Rice

Smkdsaldiner
As a VERY busy grad student, I love quick and easy dinner recipes! Especially ones that don’t involve pasta and canned sauce or frying an egg for dinner. If you like smoked salmon you will love this. It was so easy to make and delicious. Here’s what you’ll need:

1 package or bundle of Asparagus
Your choice of bread- I did a French baguette because they are delicious to make sandwiches on
A package of smoked salmon
Your favorite (not sweet) cream cheese- I did a store brand chive and onion because I thought this flavor would compliment the smoked salmon
1 cup of your favorite rice (2 cups cooked)- I did wild rice because I think it’s delicious

First things first, preheat your oven to 350 degrees for the asparagus.

Cut off the ends (not tops- for the non-asparagus user) and drizzle olive oil, pepper, and salt on the asparagus.

Place in a pan in the oven for 15-20 minutes.

Next, cook the rice. This should take about 15-20 minutes as well so the rice and asparagus should be done at about the same time.

When there is about 10 minutes left of the baking and cooking, cut your bread into sandwich slices (pending on the bread you are using, this could be different), the thicker the bread the yummier this will be. I imagine this would be delicious with ciabatta! Now toast the bread to your liking, I like a little burn :).

Get your plates ready because you will be plating as soon as the bread is toasted! As the bread is done toasting, add your cream cheese to it. Add as much or as little as you’d like. I don’t do much because the smoked salmon has a great flavor on its own in my opinion. Then add a folded over slice (or two!) of salmon to the toasted bread with cream cheese. Plate and set plates aside.

The asparagus should be done, pull it out of the oven and put your portion on your plate! Finally, add a little bit of rice!

This is a slightly carbier dinner than what I usually eat (with the bread and rice). However, it’s delicious and if you’re cooking for someone…they’ll think you slaved because it looks so fancy! It’s also fun to cook and fast paced!

Enjoy my friends!

-Ena

Mango Fruit Leathers <3 Olivia

IMG_1715
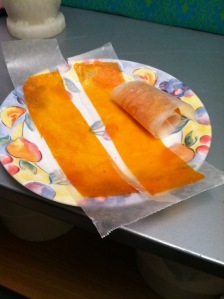
I love bringing dried fruit snacks with me to work because they are easy to eat on the go and pretty good for you. The bad thing with some of the store bought fruit leathers is 1. they are expensive 2. although they are fruit and often advertised as serving as a fruit serving, they are processed and often devoid of a lot of the nutrients that make fresh fruit so good for you. These mango leathers are simple to make (but you do need a food processor or blender) and full of natural goodness. It takes a long time to dry them out in the oven so you want to do this when you will be home for 3-6 hours. It is a sweet snack you can feel good about eating, and it is also pretty satisfying to make your own fruit leather! Mango is easy because no additives are needed. It is possible to make all sorts of fruit leathers but some fruits require honey, etc to be added in. I will experiment with those in the future. For now…

Mango Fruit Leathers

– 2-3 very ripe mangoes
– Parchment paper
That’s it!

You want to set your oven to the lowest possible temperature, or WARM, depending on the settings you have. My oven goes to 250 (too hot for this!) and then warm. For this recipe you want the oven to be approx. 150 degrees, so I used the WARM setting on my oven.

1. Start off by cutting your mango to cut the most fruit out of it as possible. Everyone cuts mangoes differently, I typically do this –> http://www.simplyrecipes.com/recipes/how_to_cut_a_mango/

2. Once your mango is cut into pieces throw it all into the food processor/blender. Process that until you reach a puree consistency (ok that reminds me of swallowing recommendations for dysphagia…) Anyway, once you have reached that consistency you are ready for the next step.

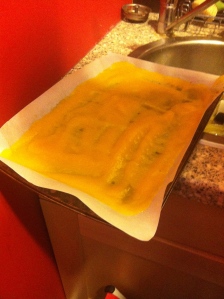
3. Line a baking pan with parchment and pour out the mango puree onto the parchment. The tough part here is to really smooth out the mango so it is even across the whole pan. You want the layer to be thin, approx. an 1/8 of an inch.
IMG_1712
The puree is NOT smooth enough here, but just to give you a general idea of what you should be working with. It is ok to keep it slightly thicker on the edges because they will dry a tad bit faster.

4. Once the puree is all smoothed out you can carefully place the pan in the oven. Cooking time varies from about 3-6 hours so you will want to check the leathers every so often. When they are done they will smooth, solid, yet sort of soft and a little sticky. You will be able to easily peel up the edges. You want the leather to come off clean, if there is puree still coating the parchment your leathers probably are not done yet. Check often because these will not taste good burnt!

5. When they are done take them out of the oven and slice them up. I kept them rolled in parchment or wax paper so they did not stick to anything and were ready to go with me to work.

Enjoy ❤ Olivia

Pineapple Cupcakes with Coconut Sugar Glaze <3 Olivia

IMG_1750
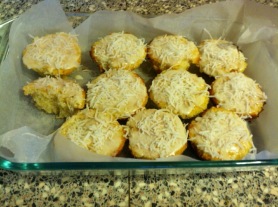
YUM! Biting into these Pina Colada flavored cupcakes is amazing! I love the sweet pineapple pieces. I kept the coconut in the frosting only but you could throw it into the batter if you wanted a more intense coconut flavor. I was very excited about making these because 1. pineapple in a cupcake sounds delicious and 2. it is a fun and unique twist on the cupcake. Making them is easy! If you are feeling lazy you could use boxed cake mix and add the extras but I recommend making it from scratch… here it goes.

Pineapple Cupcakes with Coconut Sugar Glaze
Makes 24 cupcakes

For the pineapple cake:
– 2 and 1/3 cup flour
– 3 tsp. baking powder
– 1 tsp. salt
– 1 tsp. vanilla
– 3 eggs
– 1 and 2/3 cup sugar
– 1 cup milk (any type is ok–I used 1%, whole is ideal)
– 2/3 cup butter, softened
– 1 can diced pineapple (8 oz)
– 1 can crushed pineapple (8 oz)

For the sugar-coconut glaze:
– 2 cups confectioner sugar
– 2-3 tbs. milk (start with 2 and add more as needed)
– 1/4 tsp. vanilla extract (optional)
– Shredded coconut for topping

Preheat your oven to 350 degrees.
1. In a bowl stir together your flour, salt, and baking powder.

2. In another large bowl combine the softened butter and sugar. Stir (or use a hand mixer) to combine until fluffy and well mixed.

3. Add in the eggs and vanilla extract, combine well.

4. Now you can stir in the dry ingredients (flour, baking powder, and salt) into your butter sugar mixture.

5. Mix in the milk.

6. Now open up your pineapple cans and pour in the liquid and pineapple. Gently combine.

7. All your ingredients are now combined. Pour into lightly greased muffin tins (or use liners) and bake in the oven for approximately 30 minutes. I think mine were in there for about 33 minutes. TIP- when I make muffins and cupcakes I like to fill my tins pretty high in order to get that big cupcake shape. But with these cupcakes you only want to fill about 2/3 way up because the batter is very sticky due to the pineapple juice and will spread, it is a pain to clean off the top of the pan 🙂

For the icing:
1. Combine all ingredients and stir until it has reached the desired consistency. If you want the glaze thicker, use more flour and less milk. Add in the vanilla IF you want a vanilla hint to the glaze– I left mine as a sugar glaze.

2. Once the cupcakes are cooled you can spread the glaze on top and then sprinkle the top with your shredded coconut.

ENJOY!
❤ Olivia

EatBar

eatbar
(image taken from Google Images)

I am someone who really enjoys going out to eat and experiencing new restaurants and environments. This past Friday I had friends visiting from Baltimore. Myself and my other friends in Arlington, who were going to join us on Friday night, spent a long time researching fun new places to go for dinner and drinks. Finally, we decided on EatBar after some debate. A few people I knew had gone there previously and had recommended it so we figured why not after looking into the menu.

I was apprehensive at first because the menu is small and I knew there was not a lot of parking available. But man oh man…was I wrong about everything!! I called earlier on in the day on Friday to make sure that they didn’t take reservations, since there was 5 of us, (they don’t) and just to ask about parking. A really helpful man informed me about their parking lot, street parking, AND that after 6 you can park across the street at the cleaners – who knew!! So my fear was erased.

We got to EatBar around 8pm and were worried about the wait. There was none (which after eating the food, drinking the drinks, and the overall environment we did not understand). This restaurant is nothing short of a scene out of Sex and the City or something you would expect in Manhattan. It is a lounge which is decorated fabulously and the whole environment is this trendy relaxed “take a load off” scene. There was a fake fire going on a huge flat screen TV in the front room, which houses the bar and some booths, nooks and crannies (very cozy). We sat in the back which was full on lounge style. U shaped couches all around, some bar tables and stools, and another bar area. We loved the ambiance.

Now onto the BEST part of the place (and this is saying a lot because the environment and feel of the whole place was great!)…the food and drinks!! We were all in a very relaxed mood, so everyone got wine and beer. The men got their pumpkin beer and they raved about how delicious it was. The ladies all got different types of wine, their selection is plentiful, and all the wines were delicious.

The menu is small…but do NOT let this fool you. Everything on the menu is amazing. It is tapas style so we decided to all get 2-3 plates and share. They have amazing “sliders” which are very very reasonably priced…they are bigger than your typical sliders and we tried all of them! Each slider was more amazing than the next. The lamb and pork ones were definitely the man favorites of the group. I tried the fried green tomato slider (first time trying a fried green tomato- been missing out!) and it was amazing. The batter was incredible…honestly my mouth is watering thinking about it. We also tried the chicken croquettes, corn bread, and the bang bang broccoli. Truthfully, each dish was better than the last. The broccoli was in a sweet and sour chili sauce and fried (I know…), it was different and savory. We all loved it. The corn bread was HUGE; we got 2 orders and could barely finish them. Every single plate was larger than your typical tapas plate and incredibly reasonably priced (might even say on the cheap side for the type of food they are offering).

I will ABSOLUTELY be going back to EatBar. I’ve already informed my friends and family that I will be taking them here when they come visit. The website link is below…if you are in the Arlington area you MUST swing by here. It is going to be our next girl’s night out and I cannot wait for more reasons to go here. What a hidden gem!!

http://eat-bar.com/

Enjoy!

-Ena

Healthy Mexican Flavors, Turkey and Veggie Lasagna

Lasagna

One of the first things I ever attempted to make on my own is lasagna (for obviously delicious reasons). I have practically perfected the recipe but I change it up here and there. Sometimes, when I want a heartier version, I add in ricotta cheese. Today I wanted to make a healthy, veggie packed, and Mexican flavored lasagna. I make this in a small glass lasagna dish since I’m only cooking for one (and get plenty of leftovers!!). Here’s what you’ll need:

1 jar of your favorite pasta or tomato sauce
½ a pound of cooked and drained ground turkey (do this first and put it aside so you’re ready to add right away)
1.5 peppers diced up
1/2 can of corn (rinsed and drained)
1/2 can of black beans (rinsed and drained)
1/2 package of your favorite oven ready (no boiling required) lasagna noodles
4 slices of whatever cheese you like (I did pepper jack this time to play up the Mexican flavors)
1 teaspoon of onion powder
1 teaspoon of pepper

Preheat your oven to 375 degrees.

Mix everything but about 3/4 cup of the sauce and the cheese (set these aside) into a big bowl. Now you’re ready to start layering.

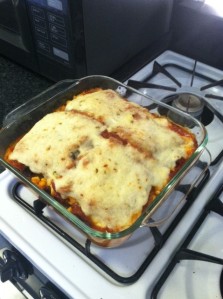
Start by covering the bottom of your lasagna pan with the red sauce; make sure you still have some left over. Then add a layer of the lasagna noodles. Pour in the mixture of the ingredients so you are covering the noodles. Keep rotating from noodles to the mixture until it is done, be heavy handed with the mixture…should be about 3 to 4 layers if you are adding enough in between. The last layer should be the mixture. Then add the extra left over sauce and layer the cheese slices next to each other.

Bake at 375 for about 45-50 minutes (longer if you’re doubling the recipe). You can tell it’s ready when the cheese starts to brown. It’ll be tasty and you’ll want seconds and thirds…trust me. This is also something you can freeze and reheat for later meals. You can add in any veggies or meats you want or take anything out, adding cheese inside makes it even more delicious. I just like the combination of beans/corn with the peppers and turkey! Make to your
liking.

Doubling the recipe will result in a full lasagna pan…like I said this one is just a small one. The dish is healthy too because the ONLY cheese is on top. So it is practically veggies upon veggies and turkey with red sauce and a few noodles!

Enjoy!

-Ena

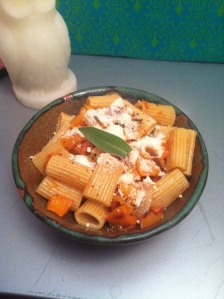
Pasta with Butternut Squash and Sage Brown Butter <3 Olivia

IMG_1707
Soo good! This recipe is inspired by a dish at Founding Farmers in DC (if you live in DC and have not been there yet, you are doing something wrong–it is literally incredible). This recipe can be made into a ravioli dish which is great, but more time consuming. I will post that one at another time. This is healthy, flavorful, seasonal, and relatively easy to make.

Pasta with Butternut Squash and Sage Brown Butter:

– 1 box pasta (I used rigatoni, but it doesn’t matter)
– 1 butternut squash
– 1 package fresh sage leaves (a good handful)
– 1/2 onion (any color)
– 5 tbs. butter
– 1-2 tbs. olive oil
– 3/4 cup parmesan cheese
– 2-3 garlic cloves, finely chopped.
– salt and pepper to taste

Preheat oven to 400 degrees
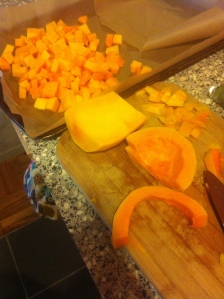
1. Peel your squash until the orange color shows on the edges. I used a vegetable peeler. Once it is peeled you cut the squash in half lengthwise and remove the seeds. Then dice your squash into 1/4-1/2 inch pieces. Place squash on a baking pan.

IMG_1702

2. Cut up your onion into pieces that are about the same size as your squash pieces. Add those to the pan.

3. Toss onion and squash in olive oil to prevent sticking, season with salt and pepper. Bake until they begin to get soft and brown, approximately 35-40 minutes.

4. Once that is about halfway done you can start boiling your water for the pasta. Follow directions on box.

5. In a sauce pan heated to medium heat place the butter and sage (roughly chopped into large pieces- reserve a few leaves for later) and stir constantly. The mixture will begin to bubble and brown, continue stirring for about 4 minutes. Once the butter is browned you are ready for the next step.

6. Reduce heat slightly. Add the garlic to the brown butter and stir constantly for 45 sec- 1 minute. Remove from heat.

7. Once the vegetables are done remove them from the oven. You are now ready to combine the pasta, vegetables, and brown butter into one large pot/bowl. Stir in parmesan if desired or add to each individual serving as a topping. I like to add the remaining sage leaves to the top, finely chopped for extra flavor. Sage is so good but very intense, omit this step if you don’t want extra sage flavor.
Enjoy this delicious autumn meal!

❤ Olivia

Easy, Yeastless, Sugarless, Whole Wheat Bread

breaddone
This simple recipe will NOT disappoint!!! Crunchy crust SUPER fluffy inside…amazing. For a very long time I’ve wanted to try my hand at bread. To be honest, the idea sort of scared me. But after reading my umpteenth article about how horrible processed bread is for us and how much absurd sugar is added to the ingredients, I decided enough was enough. So I took to the net to find the easiest recipe I could (baby steps). This one was the EASIEST (and cheapest) I could find. Honestly, I absolutely recommend it for first time bread makers. Once you get the swing of it, you can add nuts, cranberries, seeds, and just go crazy. I plan on baking a few of these loaves for the holidays with some cranberries and walnuts as gifts! Here’s what you’ll need:
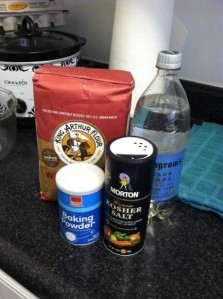
breadingredients
2 cups whole wheat flour (you can use whatever flour you want but I love whole wheat)
1 teaspoon baking powder
1 tablespoon salt
2 cups club soda (you read that right)
Ok so here comes the super simpleness…

Preheat your oven to 400 degrees.

Add together all of the dry ingredients in a medium sized bowl and mix them very well.

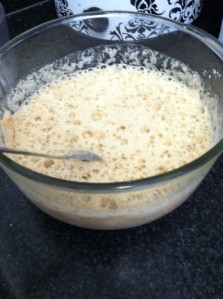
Pour the club soda into a measuring cup and make sure it doesn’t bubble too much (mine exploded upon opening so I had to wait a little to use it). Once it is measured, slowly pour it into the mixture. I waited about 30 seconds then started mixing it WELL with a spoon. Use a spoon to mix; it doesn’t stick because of the soda. Adding this will make it bubble and look like a maltshake as soon as you pour it into the flour mixture. But keep mixing.
breadbowl
Once it’s well mixed, pour into a greased bread pan.

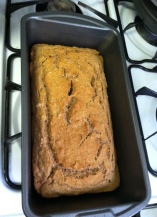
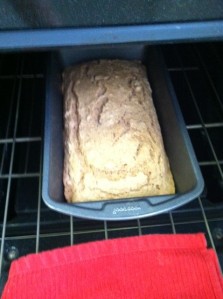
Bake at 400 for about 50 minutes. When you can stick a knife in the middle and it comes out clean, it’s done. Wait about 15 minutes to cut into it.
breadbaking
I save all my bread in the fridge and I suggest you do the same, it lasts longer. I plan on making this loaf every Sunday with some added ingredient because it’ll last me the week. It’s so so easy; we really don’t have an excuse to be eating all of those added ingredients from processed breads.

Like I said earlier, I plan on adding in some seeds and nuts next time and even adding in some cranberries as gift for the holidays.

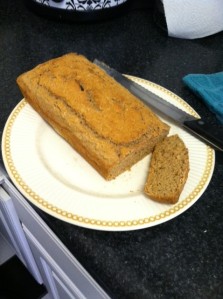
The first bite I took of this, I actually said “oh my god” out loud. I won’t ever be buying bread again after how INSANELY easy and delicious this is!! Do yourself a favor and TRY THIS!
breadcup
Enjoy and stay healthy my friends!

-Ena

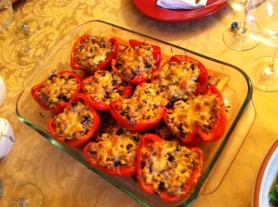
Southwestern Stuffed Peppers (150 calories a half!)

southwestern stuffed peppers
If you haven’t noticed, I really try to be as healthy as I can and careful with what I add into my food. THIS is one of the healthiest recipes I think I’ve ever made. My family and friends have all asked for it REPEATEDLY and people really do enjoy it. It’s a little more involved than most of the stuff I post, but it’s worth it. Here’s what you’ll need (the list is semi-long):

1 can corn
1 can black beans
2 cups cooked rice (1 cup uncooked- whatever kind you like)
1 pound of lean ground turkey
1 tablespoon of taco sauce (use your favorite)
1 cup of salsa (use your favorite, some people have made this and even done a mango or corn salsa)
½ cup of shredded cheese (as topping, you can use whatever kind you like)
5 peppers (I like to mix up the colors so get whatever is your favorite or a couple of different colored ones)
3 tablespoons of olive oil

Preheat your oven to 400 degrees.

Cut your peppers in halves and clean out. Use your hands to add a little olive oil to the inside and outside of your peppers. Place in a large baking dish (I used a big glass one) and set to the side.

In a large skillet, brown your meat and at the same time cook your rice. While this is cooking, place the peppers into the oven for about 20 minutes or until you see them start to brown a bit. While all of this is cooking, drain and rinse the can of corn and the can of black beans and put into a BIG mixing bowl.

When the meat is done, strain the fat. Then pour the turkey into the large mixing bowl with the over ingredients. Once the rice is done, pour all of it into the mixture as well. Then add in your taco sauce and salsa. Mix all of this VERY VERY well. And taste it, because it’s amazing….

Your peppers should be done at this point, get a salad tongs (or something like tongs) and use them to pour out the excess water and oil from the peppers. I usually just put it in a bowl then pour out later.

Once this is done, you are ready to start stuffing your peppers with your mixture!! Stuff as much or as little as you’d like, I usually just use a spoon. Add a sprinkle of cheese to the tops of your peppers.

Bake for another 15-20 minutes.

There will probably be left over mixture and I usually use that as like a make shift burrito bowl for lunch or dinner the next day. It’s really good even on its own without the peppers!!

Once done, serve with some sour cream or avocado or just eat alone (usually what I do). These halves are A TOTAL of 150 calories!! I usually struggle to even eat 2 because there is so much protein and fiber in them. It’s a surefire crowd pleaser. I usually don’t need 10 halves of this, so you can always cut the recipe in half if you don’t need this huge of a meal. Or, make it and save the mixture for dinner the rest of the week. I’ve also frozen it and taken it out when I needed a ready dinner and it was just as good.

Enjoy!

-Ena
THANK YOU, THANK YOU, THANK YOU!

menliv

Thank you to everyone for helping us reach over 1000 hits in just 4 days! We are so grateful for you all and for all of your help and support. Stay tuned and see what else we have cooking 🙂

Here’s a sneak peak to recipes coming this weekend:

Butternut Squash Ravioli
Southwestern Stuffed Peppers
Pina Colada Cupcakes
and
Turkey Veggie Lasagna

So much deliciousness to look forward to! Come back and visit us friends ❤
Ena & Olivia

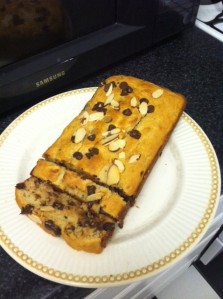
Ena’s Original Dark Chocolate, Almond, Banana Pound Cake

pound_doneee
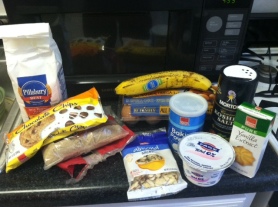
This recipe is my own creation aka, I’m really proud of it! So, I had a relatively stressful day at my externship (for no particular reason, just a mid-week slump), so naturally when I came home I needed to do something with my hands that I enjoy. BAKING! Baking has always been my first love, so I get really excited when I get a chance to do this. This pound cake is versatile, I chose to use almonds and dark chocolate, but you could add berries or other nuts as well. I think I’d like to try it again with pecans and toffee chips or with peanut butter chips. Here’s what you’ll need:

1 cup of flour
1/2 cup of dark chocolate chips- or whatever chocolate you want (for inside the cake)
2 pinches of dark chocolate chips- or whatever chocolate you want(to top the cake with)
¾ cup of light dark sugar (you can use other sugar, but this gives the cake a great color)
A little less than 6 ounces of 0% fat Greek yogurt
1 large slightly bruised banana
1/3 cup of sliced almonds (for inside the cake)
2 Pinches of sliced almonds (to top the cake with)
1 teaspoon of vanilla extract
1 teaspoon of baking powder
1 pinch of salt
1 Egg
1/3 cup of melted butter
PoundIng

This recipe will go quickly, so preheat your over to 350 degrees right away.

In a bowl, mix the mashed up banana, Greek yogurt, and melted butter. Once this is mixed, add in the sugar, egg, and vanilla extract. Then sprinkle on top the salt and baking powder.

Finally, slowly add in the flour. Take your time putting in the flour and mixing it slowly. Do not over-mix or add too much flour. Put in just enough flour to have the ingredients start to combine.

Finally, add in the almonds and dark chocolate (or whatever you are going to add in).

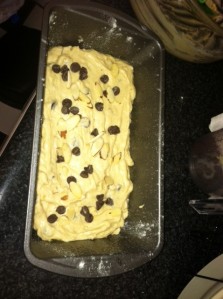
Grease and sprinkle flour on a 9×5 baking pan and spoon in the mixture. Flatten the top with a spoon so that the combination is evenly spread. Then, take the chocolate and almonds (or whatever you are using) and sprinkle on top.
pound_pan

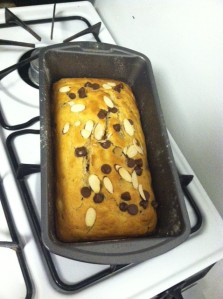
Bake at 350 degrees for 45-50 minutes. Turn the pan the opposite way in the oven at 30 minutes. KEEP CHECKING IT! You will be able to smell the goodness when it’s done. If you can stick a knife in the center and it comes out clean, it is done.

pound_donepan
Honestly, I cannot believeeeee how well this turned out being that it is all from my head! I hope you enjoy it as much as I did  Feel free to edit and change whatever and let me know how it turns out!

Enjoy!

-Ena
S’mores Bars <3 Olivia

IMG_1659

I really like desserts in the form of bars/brownies/blondies. These s’mores bars are pretty incredible- but not quite as good as my snickerdoodle blondies (in my opinion) which will be posted in the near future.
This recipe will fill an 8×8 baking dish, so that could be anywhere from 4-20 servings depending on how hungry you are… 🙂

S’mores Bars

– 1/2 cup butter (1 stick), softened
– 3/4 cup sugar
– 1 egg
– 1 & 1/3 cup flour
– 3/4 cup graham cracker crumbs (I used about 6 graham crackers crushed up, IF I am remembering correctly)
– 1 tsp. vanilla extract
– 1 tsp. baking powder
– 1/4 tsp salt
– 2 giant Hershey chocolate bars (or 5 regular)
– 2 & 1/2 cups mini marshmallows (or fluff would work also)

Preheat your oven to 350 degrees.
1. In a large bowl beat the butter and sugar together until blended (I used a spoon, a hand mixer would be fine also).
2. Add in the egg, vanilla.
3. In a separate bowl combine the remaining dry ingredients (flour, graham cracker crumbs, baking powder, and salt).
4. Add the dry ingredients into your butter/sugar mixture and beat until blended. You now have your graham cracker blondie base.
5. Using roughly 1/2 to 2/3 of the blondie base, cover the bottom of a greased 8×8 baking pan (or line with parchment). Press down the dough to ensure it is even. The batter is delicious and you might want to eat some at this point.
6. Bake the blondie base for approximately 15 minutes.
7. Remove baking pan from the oven and spread your chocolate bars evenly over the top of the blondies. 2 giant bars fit perfectly for me.
8. Pour the mini marshmallows (or fluff) over the chocolate bars. Fluff may be difficult here because the chocolate is beginning to melt.
9. Use the remaining dough to cover the marshmallows. Because of the consistency I found it very difficult to spread the dough over the marshmallows so I just sprinkled the dough evenly over the surface, resulting in a “crumble” look.
10. Place back in the oven for another 15 minutes. Let cool before eating (I thought it would be better when it was still warm, and I was wrong, it is better when cooled). Yummy.

❤ Olivia

Crockpot Apple Butter <3 Olivia

IMG_1629

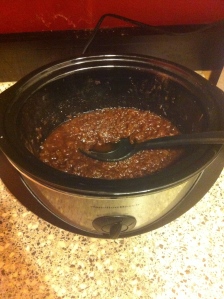
Ok, I need to take better pictures of the food I make. But if you have ever had apple butter, you probably know how good it is. My main motivation behind making this recipe is so that I can master apple butter and give it as gifts over the holidays (it looks so pretty in a mason jar with fabric and a ribbon).  For this recipe you will need a crockpot, and if you have a blender (or even better, an immersion blender) you will be able to get your butter very smooth. I do not have a blender so my butter is a little chunky but I think it is just as good that way. I use the apple butter in my PB & J sandwiches and it makes them so much better! This recipe made enough to fill one 24oz jar.

Apple Butter:

– 6 apples (I used granny smith, but any assortment is good)
– 1/2 cup sugar
– 1/2 cup brown sugar (I used light)
– 1 tbs. cinnamon
– 1/4 tsp nutmeg
– Dash ground cloves (if you have)

1. Dice up your apples (if you have a blender you don’t need to worry about getting the chunks small, but since I do not, I cut up my apples into small, 1/4 inch chunks and I left the skin on).
2. Pour the apples, sugar, cinnamon, nutmeg, and cloves straight into the crockpot. Give the ingredients a good stir.
3. Cook the mixture on HIGH for 1-2 hours, stir, and turn to low. (if you want to go to sleep/work you can just start the mixture on LOW right away and add an extra 2 hours, the HIGH step just helps to break down the apples).
4. Continue cooking on LOW for 8-10 hours (a few more won’t hurt).
5. I then crushed up my apples with a spoon right in the crock, as they are now very soft. If you are using a blender you can go ahead and blend your mixture to the consistency of your liking.
6. Pour into glass jars and use on muffins, PB & J, toast, pancakes, etc! Keeps fresh for 3-4 weeks and can also be frozen.

Holiday (/any day) Chocolate Toffee Bark

chocolatebark

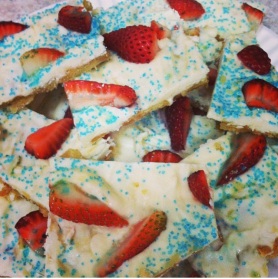
Last year, I had about 1000 (okay, 4) places to go for the holidays. I needed a recipe I could make in BULK and that was cheap. Here comes the Chocolate Toffee Bark to the rescue! Like almost all of my recipes, it’s really easy and needs few ingredients. The picture above is from when I made it for the Fourth of July! Your eyes do not deceive you; saltine crackers are in the mix. Here’s what you’ll need:

2 packages of Saltine Crackers (any brand), usually there’s 4 packages in a box, so it’s easy to buy enough for two barks.
2.5 cups of whatever chocolate chips you want to use (I’ve used white chocolate, milk chocolate, mixture of white and dark- gives it a fun color, and all dark)
1 cup of brown sugar
1 stick of butter

and any additions you want to make. I’ve done strawberries and sprinkles, almonds, pecans…it’s versatile!

Okay here goes easy.

First, take out a baking sheet and cover it with foil. Spray the foil with a little cooking spray. Line the foil with the saltine crackers in straight rows- you can break the crackers in half if you need to, and cover the pan (as little spaces as possible left). Get your chocolate chips ready in a bowl.

Preheat your oven to 350 degrees.

Next, place the butter in a pan and put on medium heat. Mix in the sugar and stir until it is JUST bubbling. If you keep it on longer, you will burn it and have to remake this.

Pour this mixture over the saltine crackers and make sure you spread it out as evenly as possible! Place in your oven at 350 degrees for 5 minutes. Remove promptly.

Then, carefully and EVENLY pour the chocolate chips over the HOT toffee. Use a spoon to melt the chips and make them come together to coat the top of the cracker toffee combination. Make sure that you get the melted chocolate as even as possible.

Now is when you would make whatever, if any, addition you would like. Nuts, fruit, sprinkles. Make sure you do this while the chocolate is still melting so that the addition really sticks.

Once you are done, place the entire baking sheet in your fridge for at least an hour. I like to leave it over night so that the chocolate really hardens.

When it is ready to be taken out, use your hands to unevenly break up the bark. There will probably be pieces of the crackers without chocolate on them. I just cut off the cracker (or leave the edges at home for me!).

This is a crowd pleaser. People ask me to make this ALL THE TIME. But shhhh, no one has to know how easy this is J

Enjoy!

-Ena
Corn Dip- Nom.

corndip
Like many people, I am a dip person. I could live off of appetizers and various dips. This dip was not only easy, but scrumptious as well. Most of the ingredients, if not all, you will probably have in your fridge just waiting for you to use them. Here’s what you’ll need:

1 green pepper
1 can of corn
1 teaspoon of onion powder
½ cup of fat free mayo (I know I usually say “use what you want” but with mayo..I insist you use fat free. C’mon.)
½ cup of fat free sour cream (do it.)
1 cup shredded cheese (your choice)
1/3 cup of grated Parmesan cheese
1 teaspoon of pepper

With this dip, all you want to do is mix all of the ingredients together. Chop up the pepper as small as you’d like and strain the corn, then mix to your heart’s content. Place in a bowl and in the fridge until ready for destruction. I thought it was DELICIOUS served with pita chips, but I imagine it would be good with anything. I think next time, I’d like to try it with multigrain chips.

I made this dip and had a ton of leftovers and munched on this for a week. Also, I didn’t have this in my apartment so I didn’t use it, but next time I’m going to add a can of black beans to the mix as well.

This is another easy peasy, quick and delicious recipe that you probably won’t even have to go shopping for. It’s great to have it in your repertoire.

Enjoy!

-Ena
Strawberry Muffins <3 Olivia

IMG_1645

Ena’s raspberry cake inspired me to post this. The picture really doesn’t do these muffins justice. They are so pretty and taste really fresh. They are particularly amazing when served warm.  Side note- those muffins are in a Honeycombs box and until a recent Wal-Mart trip I had not seen or heard of Honeycombs in years, but they are still decently good (6/10). Anyway… for these muffins you will pretty much use the cabinet staples plus a lot of fresh strawberries. The recipe will yield 12 muffins.

Strawberry Muffins:

– 2 cups fresh strawberries
– 3/4 cup white sugar
– 1/4 cup butter, soft or melted
– 2 eggs
– 1 & 3/4 cup flour (white or whole wheat)
– 1 tsp. vanilla extract
– 1/2 tsp. baking powder
– 1/4 tsp. salt
– Dash of nutmeg, cinnamon (both are optional)

Preheat oven to 425 degrees.
1. Dice strawberries to size of your choice-depending on how distinct you want the strawberry chunks to be.
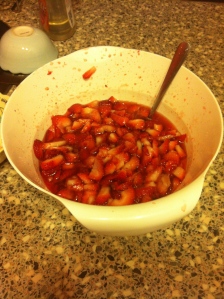
2. Combine the strawberries and 1/2 cup of the sugar (l/4 cup will be used later) in a bowl. Stir. Set aside this mixture for 30-60 minutes to allow juice to collect.
IMG_1639
3. Cream together the butter and remaining sugar (1/4 cup) with a mixer or vigorously by hand.
4. Beat in the eggs, vanilla, flour, baking soda, salt, nutmeg & cinnamon (if using).
5. Now drain the liquid that is collecting in your bowl of berries straight into the batter you have just made. Mix. Now you can add the strawberries and gently mix.
6. Pour batter into lightly greased cupcake tins and bake for 18-22 minutes, or until a toothpick removes cleanly.
Enjoy as a breakfast treat or dessert.
❤ Olivia

Girl’s Night Pesto, Mozz, Tomato Bruschetta

pestoapp

I had a very small girl’s night/housewarming party when I first moved into my apartment. I was thinking about what to make as snacks and realized I was running out of time! So, I looked into my fridge and realized that I did NOT have much to work with…or any time to run to the store. And with this, I did what I do…and improvised! What turned out was something delicious. Here’s what you’ll need:

½ a cup of pesto (I use the Trader Joe’s kind because I think its delish, if you have a food processor it’s really easy to make your own too- this is on my list of purchases )
6 cherry tomatoes
6 mozzarella balls (the kind that are bite sized)
½ of a French baguette

I started off by cutting the French baguette in to thin vertical slices and put them in the oven at 350 degrees for about 10 minutes. I kept touching the bread to see when it would get nice and crispy. While you wait, cut the tomatoes and mozzarella into halves, place on a toothpick.

When done, remove them from the oven and place on your serving dish. Take a knife and lightly spread the pesto sauce on each piece of bread. Then place the toothpick, mozzarella down, on the bread. Arrange nicely, you’re done!
These are great, super easy, and delicious. I had a few leftovers and just put them in the fridge and ate them the next day. I will be making these again FOR SURE. Especially when I’m in a bind.

Enjoy!

-Ena
EASIEST Buffalo Chicken Dip EVER

Football season is hereee!! Who needs a quick and easy recipe for a tailgate/party/just a reason to grub. This is another recipe I last made for my birthday, and it was devoured prior to any photo ops. However, this does not take away from the easiness and goodness of the recipe. Here’s what you’ll need:

1 pound of shredded chicken (if you need shredding directions, check out Southwestern Chili for step by step directions)
8 oz package of fat free crème cheese (you can use whatever kind or fat you want)
2 tablespoons of Tabasco Sauce (of whatever kind of hot sauce you like)
1 ½ cup of shredded cheddar cheese

Ready for the easiness…go.

Get a baking dish (mine is 8 x 8), lightly spray it with cooking spray. Preheat your oven to 350 degrees.
In a bowl, mix the shredded chicken and cream cheese WELL. Once this is mixed, spread the mixture onto the pan. Once the mixture is spread, loosely shake the Tabasco Sauce over the mixture directly in the pan. Do this as much or as little as you want, this is to your own taste. The one I made with about 2 tablespoons gave it a little kick but not overwhelming. Lastly, put the cheddar cheese evenly over the Tabasco.

Put in the oven for about 15-20 minutes or until the cheese is melted.

This is really simple, really quick, and equally as delicious. Great for when you’re in a bind or need just one more quick appetizer at a party. Everyone loved it; it was the first thing that was gone!

Enjoy!

-Ena
Northside Social

northsidesocial
(image taken from Google Images)

For the past few months I have really enjoyed exploring new places in the NoVa area. I was recently chatting with a good friend of mine, Courtney, about how coffee shops are probably one of my happy places. She mentioned this very trendy little coffee shop she goes to in the Arlington area called Northside Social. One random day, in the beginning of the semester and pre-externship, I had some free time and wanted to enjoy the beautiful weather. Courtney explained how to find the coffee shop, so I took myself on a date.

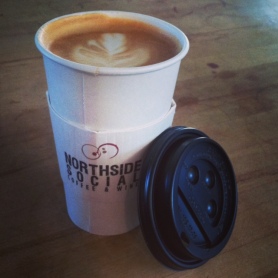
I was able to sit outside (inside and outside are both really nicely decorated), had to fight a very hipster looking couple for the last table .This place is ADORABLE. The coffee (slightly over-priced but hey, we all pay for Starbucks, and I’m a latte girl so it may just be my choices) was delicious but the environment is what got me! There is a huge variety of baked goods – from hearty to sweet- and food options to choose from. I was just looking for a snack and indulged in a corn and jalapeno muffin (amazing) and an iced jasmine green tea. Both were really good and the muffin was not as heavy as you would imagine. The other few times I’ve been there, I’ve tried their iced caramel coffee, hot vanilla latte, and their smoked salmon sandwich. All of the above have been incredible. Seriously, this place has yet to disappoint. Also, I absolutely love that they use local teas and milk, makes you feel better about where you chose to spend some moolah.

northside

There is usually an array of people from business people making calls, students doing work, and friends meeting for coffee and lunch dates. It has a great ambiance and their decorations are fun too. Right now they are ready for Halloween and it is really enticing! The place is super hipster and the music downstairs is “medium” loud, but upstairs is great for work (Courtney and I have made this place a Friday tradition to catch up on work).
Also, we have yet to check this out but I am in no way ruling it out! They have a 5pm $5 wine happy hour…nothing bad about that. I think this would be a really fun idea for a girl’s night out- I just got the idea to plan this once this semester is over. Thanks blog.

Here is their website so you can check it out directly and see how versatile their menu is. If you’re in the NoVa area or just looking for a new spot, I highly suggest Northside Social. I’m already dreading moving from this area (in 8 months…. Jumping the gun) because I will really miss this place!

http://northsidesocialarlington.com/

Enjoy!

-Ena
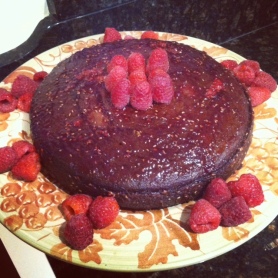
Chocolate Deliciousness with a (Greek Yogurt) twist and a homemade Raspberry Reduction

GYChoc4

My Dad’s birthday was recently and my Mom was making a Bosnian dessert. I decided I wanted to try a new cake recipe so we would have sugar galore! We ended up with chocolate cake with a raspberry reduction, Bosnian crème cake, macaroons, and chocolate croissants…we like food at my house. This cake has a really fun twist to it (drum roll please), I used Greek yogurt! Ok, so here’s what you’ll need:

GYChoc1

Cake ingredients:
1/3 cup dark cocoa powder (I used Hershey’s dark cocoa)
1/3 cup hot water
1-1/2 cups unbleached all-purpose flour
1/2 teaspoon baking soda
1/2 teaspoon baking powder
1/2 teaspoon salt
3/4 cup canola oil
1/3 cup of sugar (you can do any sugar you have, I used white but I’ve seen people use brown with the same recipe)
2 eggs
1 tablespoon vanilla extract
1/2 cup or 6 ounces of Greek yogurt (I used Chobani 0% fat)

Raspberry Reduction Ingredients:
¾ cup of any raspberry jam
¾ cup of water
¼ cup of sugar
8-10 raspberries

Set aside about 20 raspberries to use as a decoration 🙂 Fancy!

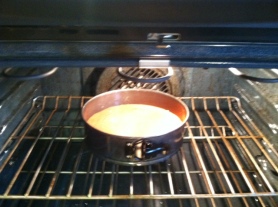
First, preheat your oven to 350 degrees. Then, get your cake pan and grease it up good. I used my Mom’s amazing pan that unclips on the side and creates a perfect circle. But any cake pan you want to use is good!
Now, in a small bowl, take your hot water (this can just be hot from the sink, no need to boil it) and mix it up with the cocoa really well. Set aside.

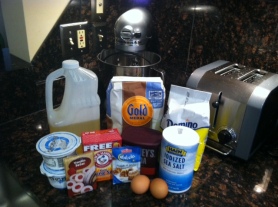
Next, if you have a standing mixer use that- it’ll make this SO easy (I used my Mom’s Kitchen Aid… anyone noticing a pattern. Thanks for your kitchen, Mom!!). If you don’t, either use your hands, hand held mixer, or whatever tool you want to use. Mix the flour, baking soda, baking powder, eggs, salt, canola oil, sugar, and vanilla. Make sure it’s all nice and mixed up!

Finally, in the mixture, alternate putting in the cocoa mixture with the Greek Yogurt until it is all one delicious concoction.

When it is all mixed up, pour into your greased cake pan and bake at 350 for 25-30 minutes. Watch it…you don’t want it to burn and it is pretty easy to do so.

GYChoc3

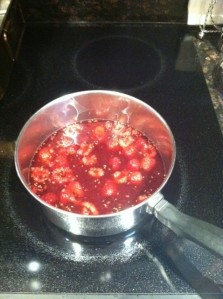
NOW! Comes the fun part…when there is about ten minutes left of baking, get a pot. Put the raspberry jam, water, and sugar in the pot. Put the mixture on medium on the stovetop mix it often. Wait until the mixture starts to get hot then add in the fresh raspberries, mix some more. Allow this to simmer for about 5-8 minutes. You’ll smell amazing raspberry goodness when it is ready. Put on low until the cake is ready.

GYRasp1

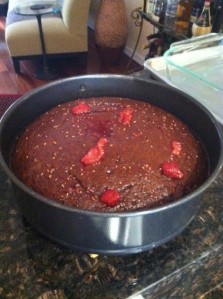
This is important, when the cake is done (aka you can pull out a toothpick with no residue) and while it is still in the hot pan, pour the raspberry mixture over the cake and allow for it to soak in and cool down. You’ll want to do this slowly and make sure the sides and the middle get a good dose of the reduction.

GYChoc2
Wait to serve the cake until it is totally cooled. I ended up putting a little bit of raspberry jam on top of the cake (and I mean a little) and putting raspberries on top and on the sides. When we served it, we made sure everyone got raspberries because the cake was truly delicious combined with this flavor.

This cake will surprise you! It is not overly sweet and the reduction make it super (gonna hate myself for using this word) moist. Your friends and family will be fascinated by your use of Greek yogurt, all of our friends couldn’t believe it. I liked the cake so much I took a big piece home with me from my parent’s house…and I’m the type to want all sugar out of my apartment because, well, I WILL eat it all. And I did. And it was an awesome treat after an 18 hour day in grad school.

Enjoy!

-Ena
Quichie, Quiche, Quiche

smsalasp.quiche

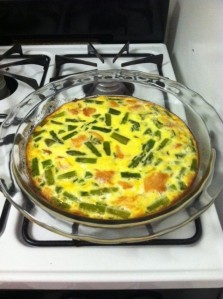
YUM. Who doesn’t love a good quiche? I sure do. I have a go to quiche recipe (crust and all) that is ultra easy and very versatile. Here’s what you’ll need:

Crust:
¾ cup of breadcrumbs
¾ stick of butter

Quiche Body:
3 eggs
½ cup of milk
and whatever ingredients you’ve decided to use. This time around I used:

1 package of asparagus
1 package of smoked salmon
¼ cup of parmesan cheese
¼ cup of Mexican cheese blend
1 teaspoon of salt
photo 1 (2)

Crust Recipe
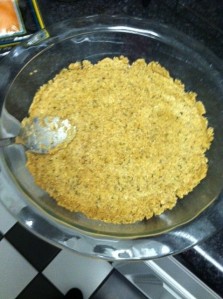
Are you ready for the easiest/best/did I say easiest crust recipe…ever? Ok here goes. Melt the butter entirely in a bowl in your microwave. Mix in the breadcrumbs in with the melted butter until the mixture starts to get dense. Take your quiche/pie pan and grease it lightly. Use a spoon and place the crust mixture into the pan, evening it out on the bottoms and on the sides as well. Place in the fridge to harden. DONE.
crust

Preheat the oven to 375 degrees.

Quiche body:
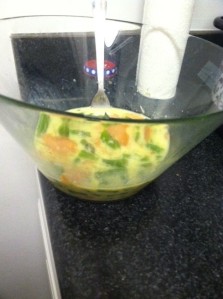
Cut up the asparagus into inch pieces and throw into some boiling water. Let it boil for approximately 10 minutes. While that’s boiling, in a bowl combine the eggs, milk, cheese, salt, and smoked salmon. Make sure the smoked salmon is in small pieces. Mix this concoction well. When the asparagus is done, add it to the mixture and mix it well.
quichebody

Take the pan with the crust out of the refrigerator and pour the mixture into the pan. Make sure it is evenly distributed. Put in the oven for 30-35 minutes.

Let it cool, and REALLY enjoy. This may be one of my favorite recipes I’ve made thus far.

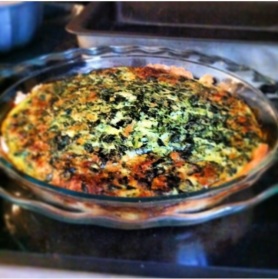
This is a photo of the exact same recipe but instead of the salmon, cheese, and asparagus, I simply added about half a bag of frozen, strained spinach.
photo (3)

Enjoy!

-Ena